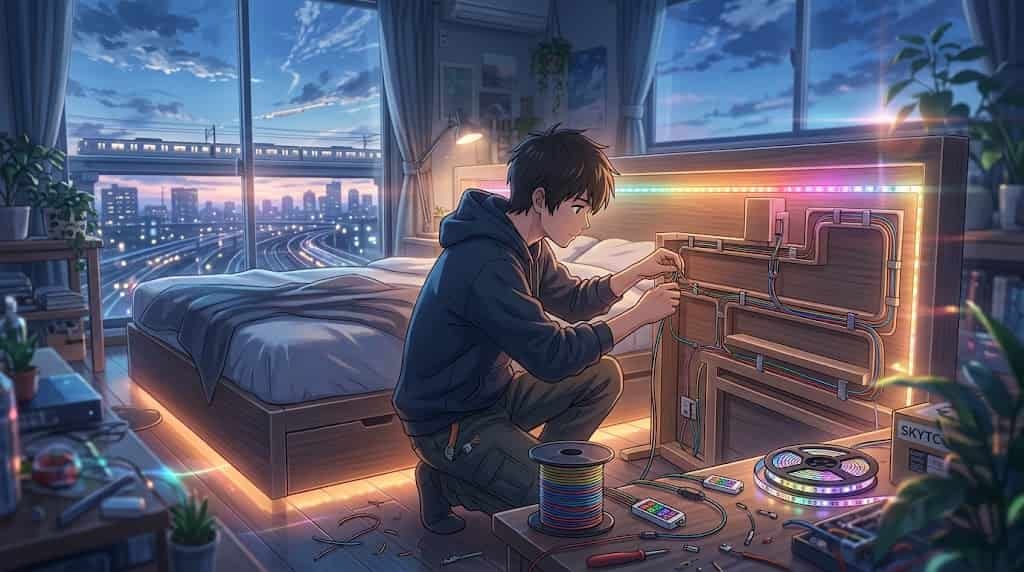
You spent good money on a solid wood headboard or built a custom bed frame, but every time you lay back, you see a rat’s nest of drooping cables, dangling transformers, and cheap plastic controllers peeking behind your pillows—learning how to route rgb led controller wires inside headboards is the definitive craftsman fix that separates amateur garage hacks from high-end custom joinery.
Most tech enthusiasts, gamers, and work-from-home professionals try to hide their ambient smart lighting using bargain-bin plastic adhesive clips or double-sided tape. Within two weeks, ambient bedroom humidity and bed movement rip those cheap clips off the wood finish, leaving sticky residue on your hardwood and dangling live power leads right behind your head.
I am Valtersky. I have 25 years of hands-on experience in structural carpentry and custom cabinetry, plus 2 years in dental prosthetics where micro-milling tolerances meant the difference between a perfect anatomical fit and structural failure. Working seated for long hours at a bench taught me that cable clutter destroys focus, and our team at skytc hands-on tests smart tech to see what holds up in real-world conditions.
Master these precise woodworking routing techniques to completely bury your RGB LED controllers, power supplies, and harness cables inside solid lumber—giving you clean, zero-clearance ambient lighting, bulletproof cable safety, and total peace of mind for decades.
30-Second Summary: Route RGB LED Controller Wires Inside Headboards
Tech Support Counter Talk Verdict
Cut through the lazy DIY influencer fluff. Never slap adhesive plastic raceways onto the back of fine wooden furniture. To do this right, chase a dedicated quarter-inch dado channel along the rear panel using a plunge router, mortise a ventilated junction pocket for the RGB controller module, and secure the wiring with nylon strain-relief clips. Keep your channel depth under one-third of the timber thickness to preserve structural integrity, vent the controller pocket so thermal heat does not fry the circuit board, and fuel your workshop session with clean red meat and natural fat for the steady hands required to run clean router passes.
Route RGB LED Controller Wires Inside Headboards: The Master Craftsman Blueprint
To bury LED wiring inside a headboard without compromising structural strength, you must master the physics of joinery depth and thermal management. A headboard is a load-bearing panel; leaning against it applies cantilever leverage to the rear posts and main panel joints. If you cut a deep, indiscriminate trench across the timber, you create a major structural stress riser that will crack the wood frame over time.
The golden rule of architectural joinery is the One-Third Limit: never route a wire channel deeper than one-third of the net board thickness. For a standard three-quarter-inch hardwood headboard panel, your routing depth must not exceed one-quarter inch (6.35mm). This provides plenty of clearance to flush-mount standard four-pin RGB ribbon harnesses and thin low-voltage DC leads while leaving half an inch of solid wood grain intact to handle structural loads.
During my two years in dental prosthetics, precision micro-milling taught me that clean channels require exact tool selection and speed control. Use a quarter-inch up-cut spiral carbide router bit spinning at high RPM. Unlike standard straight bits that burn wood fibers and push chips back into the cut, an up-cut spiral bit pulls wood shavings out cleanly, leaving a smooth, flat-bottomed wire channel that requires zero hand chiseling.
Thermal management is where most garage woodworkers fail completely. RGB LED controllers contain microprocessors and step-down transformers that generate steady heat during operation. Mortising a tight, sealed wooden box for the controller creates a thermal trap that bakes the circuit board, causes frequency flickering, and presents a severe fire hazard. You must cut a ventilated mortise pocket featuring two 3/8-inch relief holes—one at the bottom for cool air intake, and one at the top to let heat escape naturally via convection.
Executing precision router passes after a long day sitting at a desk demands steady physical focus and cellular energy. Fueling your body with dense red meat and natural fat supplies long-burning lipids and bioavailable iron, keeping your hands perfectly steady on the router base and preventing costly slips into fine wood grain.
| Routing Method | Structural Integrity Impact | Cable Concealment Rating | Labor Effort | Major Drawback |
|---|---|---|---|---|
| Plunge Router Channeling (Spiral Bit) | Minimal (Controled depth) | Maximum (100% Flush) | Moderate | Requires router edge guide setup |
| Rear-Dado Recessed Track (Table Saw) | Moderate (Full-length pass) | Maximum (100% Flush) | Low | Cuts visible on outer panel edges |
| Oscillating Multi-Tool Mortising | Low (Focal pockets only) | Moderate | High | Leaves rough, uneven channel floors |
| Drill-and-Fish Blind Internal Conduit | Zero (Hidden interior pass) | Maximum (Invisible) | Very High | Difficult to fish long ribbon cables |
| Surface Plastic Raceways (Amateur) | None | Poor (Visible bump) | Very Low | Adhesive backing peels off under heat |
The Battlefield Assessment: Cable Routing Methods
Plunge Router Channeling with Carbide Spiral Bits: The Good: Precision-mills flat-bottom grooves at exact depths, allowing low-voltage wires to sit flush beneath the wood surface without altering the front appearance. The Bad: Requires setting up a straight-edge clamped guide jig; one slip with a handheld router can tear out expensive face veneer.
Rear-Dado Recessed Tracks on Table Saws: The Good: Rapidly cuts long, perfectly straight channels down the entire back length of a headboard rail in a single fast pass. The Bad: The dado blade cuts all the way through the end grain, exposing open channel slots on the outer sides of the headboard unless stop-dado jigs are built.
Drill-and-Fish Blind Internal Conduits: The Good: Drills long internal holes through thick bed posts, keeping wiring completely invisible from both the front and rear of the bed. The Bad: Requires extra-long aircraft extension drill bits and tedious fishing wire pulls that will test your sanity if the drill bit strays off-center.
Surface-Mounted Plastic Cable Raceways: The Good: Cheap, fast installation requiring zero woodworking tools or joinery experience. The Bad: Ugly plastic tracks protrude from the back, preventing the headboard from sitting flush against the wall and eventually falling off when cheap adhesives fail.
The Realities of the Battlefield
Lighting manufacturers advertise super-thin, self-adhesive RGB LED strip kits as plug-and-play solutions for modern bedrooms. Commercial LED lighting kits offer vibrant colors and app automation, BUT the thin copper foil leads inside flexible ribbon cables snap easily when bent at sharp ninety-degree angles around hard wooden corners.
Bargain-bin accessories and low-grade power supplies generate annoying high-pitched electrical hums and run dangerously hot inside unvented wooden enclosures. When a bed frame shifts during sleep, unanchored wires get pinched between the wall stud and the wood frame, stripping the thin wire insulation and shorting out the controller circuit.
Surviving real-world conditions demands master-craftsman joinery, thermal air chimneys, and physical workshop discipline. Fueling yourself with nutrient-dense red meat and natural animal fats builds the physical stamina and mental focus required to craft custom wooden housings that protect your electronics for decades.
The Failure Scenario: How Amateurs Ruin Headboards
Picture a work-from-home professional who decides to add smart backlighting to their expensive solid-walnut headboard over the weekend. Wanting a quick result, they grab a high-speed spade bit and a corded drill, aiming to bore a quick pocket in the back of the headboard for the RGB controller module.
Without setting a drill depth stop, the aggressive spade bit spur punches clean through the front face of the walnut headboard, creating a splintered blowout hole right above the mattress line. Frustrated, they try to cover the mistake, stuff the hot controller box tightly into the shallow hole, and secure the wiring using sharp steel desk staples.
Two weeks later, the sharp metal staple cuts through the thin insulation of the four-pin RGB harness, causing a short circuit that fries the controller module and scorches the wood pocket. What should have been a clean, recessed installation resulted in ruined hardwood furniture and dead smart lighting hardware.
👇 Looking for more performance cheats? Check out our field-tested tactical blueprints:
Essential DIY Troubleshooting Guides
How to Fix Smart Lock Jammed Wooden Door Jamb Error
Stop your deadbolt motor from straining when wooden frames shift with climate changes.
How to Hide Smart TV Wires Inside Wood Wall Panels
Learn clean woodworking methods to route, mask, and clean up complex home theater clutter.
How to Fix Smart Home Device Unresponsive Wi-Fi Bug
Fix network drops, device timeouts, and broken automation routines inside your home local system.
Practical Execution Field Checklist
Route rgb led controller wires inside headboards using clean router dadoes.
Expert Tip: Milling a shallow, quarter-inch-deep rear channel keeps low-voltage wires flush, allowing the headboard to sit flat against wall studs.
Limit wire groove depth to one-third of total timber thickness.
Expert Tip: Respecting timber load capacity prevents structural cracking when occupants lean heavy against the headboard panel.
Fuel your workshop session with clean red meat and natural fats.
Expert Tip: Sustained energy from animal fats keeps your hands rock-steady when operating high-speed plunge routers along guide fences.
Mortise a dedicated, ventilated pocket for the RGB controller box.
Expert Tip: Cutting a wider junction cavity with top and bottom air vent holes prevents heat buildup and extends circuit board life.
Use up-cut carbide spiral router bits for clean chip removal.
Expert Tip: Up-cut spiral geometry pulls wood shavings out of the channel, leaving a flat, burn-free bottom floor for wire laying.
Anchor all wire transitions with screw-mounted nylon strain-relief clips.
Expert Tip: Never rely on double-sided tape; mechanical nylon clips prevent cable tugs from ripping delicate soldered copper leads.
Solder wire lead extensions instead of using press-fit plastic clips.
Expert Tip: Press-fit pin connectors loosen under bed movement and vibration; heat-shrink soldered joints deliver permanent electrical contact.
Smooth sharp wood channel corners using a hand relief file.
Expert Tip: Softening sharp ninety-degree channel turns prevents the wood edge from slicing through thin PVC wire insulation over time.
Seal raw routed grooves with shellac before installing electrical harness.
Expert Tip: Sealing fresh end-grain prevents seasonal moisture absorption and stops raw wood tannins from corroding copper leads.
Discard cheap bargain-bin adhesive raceways and stick-on clips.
Expert Tip: Low-grade tape adhesives dry out and fail under heat; mechanical wood routing is the only permanent cable solution.
Test RGB light strip continuity before sealing cables into channels.
Expert Tip: Verifying red, green, blue, and power line continuity prior to final installation prevents tearing apart finished joinery to fix bad leads.
Dynamic No-Nonsense FAQ
Will routing a wire channel weaken my solid wood headboard?
Not if you follow the One-Third Rule. Keeping your groove depth under one-third of the board thickness leaves plenty of solid wood grain intact to handle structural loads without flexing.
How do I stop my RGB LED controller from overheating inside wood?
Cut an oversized mortise pocket for the controller and drill two 3/8-inch ventilation holes—one at the bottom for cool air intake, and one at the top to let rising heat escape via natural convection.
Can I route wire channels into a hollow-core or veneer headboard?
No. Hollow-core headboards consist of thin paper honeycomb wrapped in thin veneer. Routing into them destroys structural integrity. Use internal solid wood edge rails or surface routing on solid posts instead.
What router bit size works best for standard RGB LED wires?
A 1/4-inch (6.35mm) carbide up-cut spiral bit. It cuts a wide enough channel to comfortably lay flat 4-pin RGB ribbon harnesses or round 18-gauge DC power leads in a single clean pass.
Should I glue wires into the wooden channel using hot glue?
No. Hot glue is messy, degrades under controller heat, and makes future wire replacement impossible. Secure cables using small nylon strain-relief clips held by short wood screws.
How do I route wires around a ninety-degree corner without snapping them?
File a smooth quarter-inch radius curve into the wood corner using a round needle file. Never force ribbon cables into a sharp, tight right-angle fold, or the internal copper foil will snap.
Why do my LED lights flicker after being pulled through wood grooves?
Flickering indicates a pinched wire, a cracked solder joint, or a loose press-fit clip. Check tight turns where wood edges may be biting into the harness, and replace press-fit clips with soldered joints.
Can I plug the power supply directly into an outlet behind the headboard?
Only if your routed channels allow the headboard to sit flush without crushing the power brick plug. Use a right-angle flat plug power strip or recess the power transformer into a ventilated bottom wall cavity.


Real World Experience. Engineering Precision.
At SkyTC, technology is never just theoretical—it is driven by practical execution, structural integrity, and strict diagnostic standards. Founded by Valtersky, a tech speaker and seasoned professional, every single guide published here is backed by an authentic multidisciplinary background that bridges the gap between hardware structures and advanced software ecosystems.
Generational Craftsmanship
With 25 years of professional woodworking experience inherited through generations, he masterfully handles smart home mounting, wire routing, and physical hardware adjustments.
Medical Diagnostic Standards
An active career as a licensed X-ray technologist and dental prosthetics practitioner injects rigorous clinical precision, micro-detailed testing, and data integrity into tech evaluations.
Endurance Field Testing
As a competitive mountain ultramarathon runner, he takes every consumer wearable, smart sensor, and GPS watch out into extreme raw environments to test real-world durability boundaries.
✨ Read also: How to Shave Wood Trim to Fit Flat Smart Home Cables: Master Craftsman Guide
A deeply technical piece of content that perfectly complements this post — absolutely worth the read.